Hi there,
We don't really celebrate Halloween in Australia which is why I was super excited to read about the SVGCuts Halloween Challenge... I finally had a good reason to decorate my house for this cool holiday!
As this was my one chance to play, I wanted to use as many files as possible! So, I wanted to make something where I could incorporate a bunch of flat and 3D elements. I'm so happy that I can finally share my finished project with you today. This is what I came up with...
As this was my one chance to play, I wanted to use as many files as possible! So, I wanted to make something where I could incorporate a bunch of flat and 3D elements. I'm so happy that I can finally share my finished project with you today. This is what I came up with...

I made a Halloween Shadow Box and the finished project measures about 24"x24". It sits proudly on my mantel in our entrance way and on its own, makes for a pretty cool decoration.
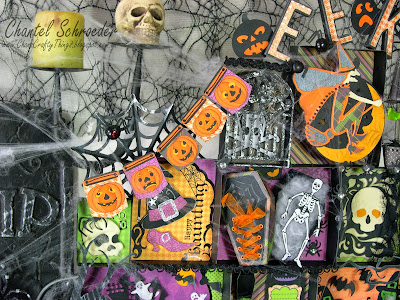
It consists of 11 boxes (I used the gift box from the Catacomb Manor kit and scaled it to different sizes), glued together and mounted on two stands. These were made from the lid of the tall apothecary jar from the Toil and Trouble kit.
I used one of my all time favourite paper collections - the Bewitched stack from DCWV. I think that it's the same stack Mary from SVGCuts used when she created the Gimme Candy Boxes Kit. It's super fun with bright oranges, purples and greens. But there are so many cute Halloween files to choose from at SVGCuts, I didn't know where to start... So I decided to take it one box at a time.
 I knew I wanted to make the cute witches shoe from Toil and Trouble, so that's where I began. I made a tiny one which is only about 1.5". I then added the Double Double sign with a cute element from the paper. Whilst I was at it, I cut out the Toil and trouble sign too as I knew I would use it somewhere on the project. It wasn't long before I knew where that one would go...
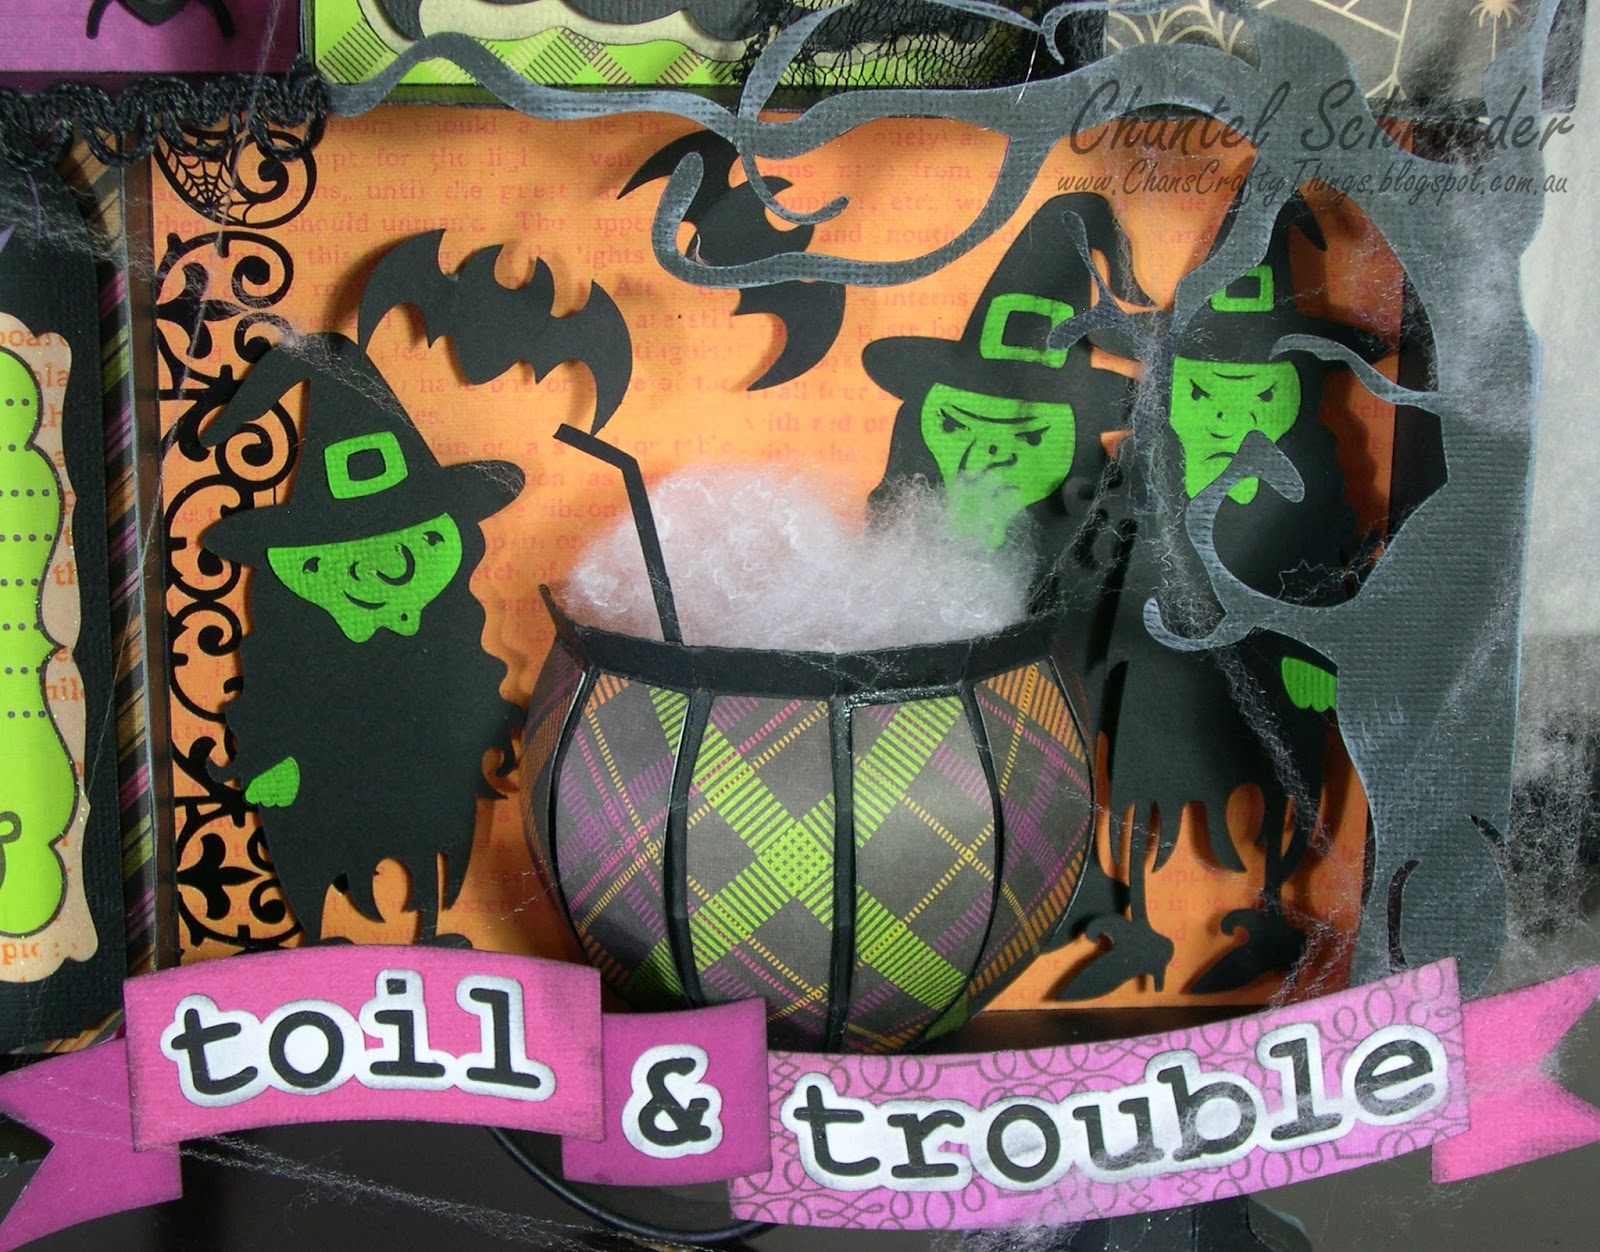
I've always thought the three witches from the Hazel's Wicked Witch Crafts Collection were pretty cool, so I just had to create a scene with them too. That said, I wasn't happy with them on their own. I wanted to create a bit of depth in my boxes and the flat elements just didn't do the trick. So I made half of the cauldron from the Party on Elm Street Kit and stuffed it with some fluffy white stuff to make it look like the cauldron is boiling. It looks great with the LED light on - as if Cassandra, Gwendolyn and Hazel are boiling up a witches brew or some other magic concoction...

I had the same problem with the haunted house silhouette from the Spooky Silhouette's collection though. It just looked too flat in the back of the box - even with pop dots. So I placed a fence, a tree silhouette and the pumpkin from the card in the Toil and Trouble Kit in the front of the box to make it look like the haunted house is far in the background.
The fun part about this project was scaling everything down to miniature size. This jointed skeleton from the Spooky Soiree Kit was scaled down to about 5" tall (or should I say short) and fits perfectly into the coffin box from the Elmurst Hollow Kit.

I made the lantern from the Sooky Soiree Kit too. I stamped the velum with a spiderweb stamp and added a glittery spider on top. I used a bit of bathtub wire to "hang" the lantern from the top of the little box and put a little LED tealight inside.
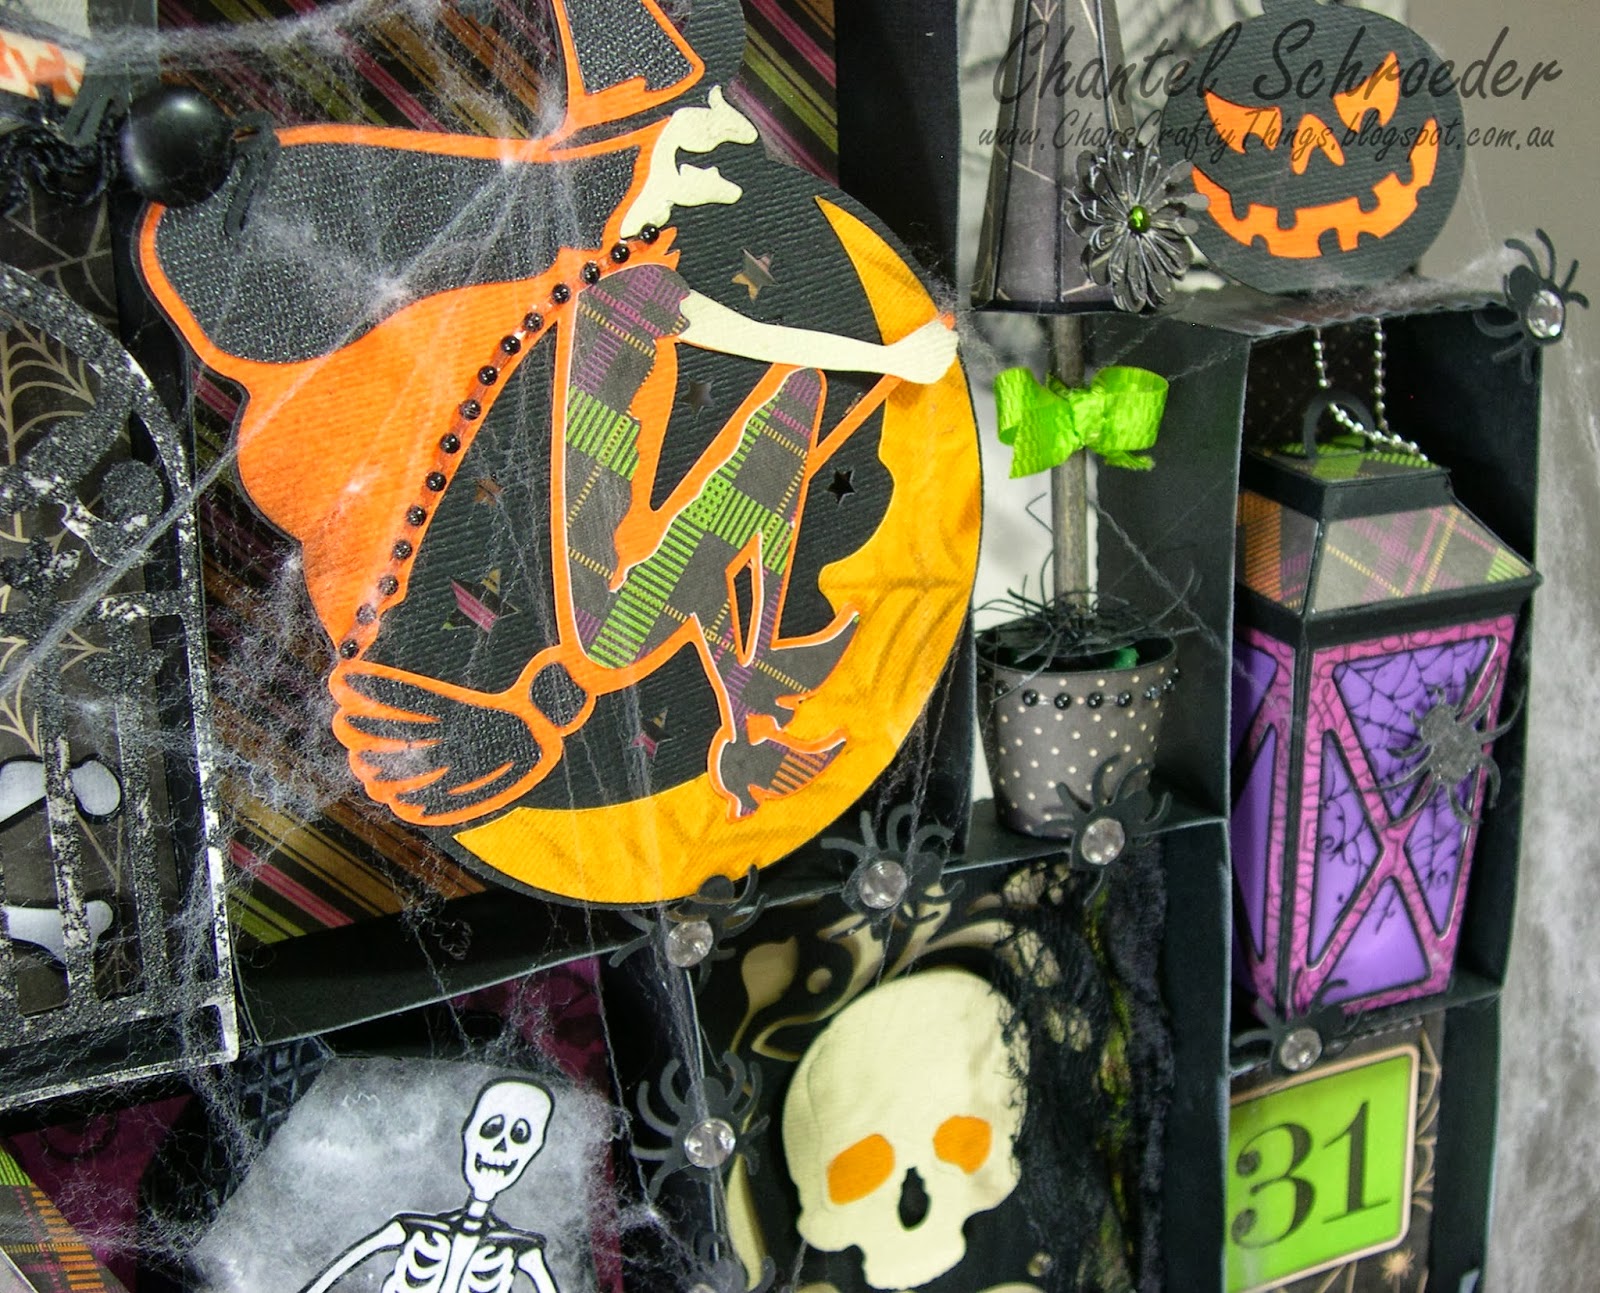
I must admit, I couldn't get enough of the elements from the newest kit - Catacomb Manor. So many great files! So I made designated one of the boxes to skull from the Catacomb Gift card and made a tiny witch hat topiary to fill in the gap between two boxes.
I cut the spiderweb rosette out in different sizes and placed a large one around the edge of the Shadow Box and another around the K from the "EEK" sign (which is also from the same kit).

Once I was done decorating each of the eleven boxes separately, I shuffled them around until I thought the order looked right and then I glued them together. I then proceeded to cut out a whole bunch of other elements such as spiders, spiderwebs, pumpkins and Jack o' Lanterns from various kits and collections and glued them all over the Shadow Box. I also made a miniature version of the banner from the Midnight Jamboree Kit. It really ties everything together so nicely.
Well, that's it for the close ups. But here are some pictures with the lights off... I just love how it comes to life with the LED tea lights in the cauldron, the lantern, behind the pumpkin and behind the flying witch..


Finally, here's a list of all the kits I used to create my Halloween shadow box:
This was by far the biggest project I have ever taken on - and BOY WAS IT FUN! Hope you enjoyed looking through the pictures. Please leave a comment, sign up to my blog or "like" my Facebook page - I would love to hear from you.
Thanks for stopping by!


No comments:
Post a Comment
I would love to hear from you - please leave a comment below.